|
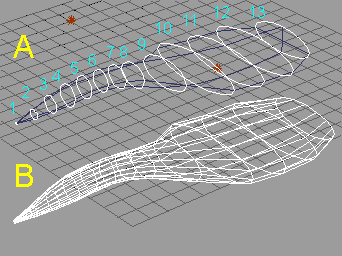
| Modeling using cross sections: Continued Step 5 When you have placed all 16-Sided polygons as shown Fig.7-1, make fighter body object by SUKININ-KUN. If you will not use SUKININ-KUN, skip to the next step. 1. Select the polygon indicated "1". 2. Press "Glue as Sibling" button, and click 16-Sided polygons in order of number shown in Fig.7-1-A. 3. Start SUKININ-KUN. 4. Press "Skin!" button. Then body object is made shown in Fig.7-1-B. 断面となる16角形を配置し終わると、このFig.7のAのようになります。次に、スキニン君を使って胴体のオブジェクトを作成します。 1. まず1の断面を選択してください。 2. 次に、並列グルーツールをクリックしてから、2、3、4、・・・13 の順に断面をクリックして断面をグループ化します。 3. スキニン君を起動します。 4. 「Skin!」ボタンを押すと、Bのようなオブジェクトが作成されます。
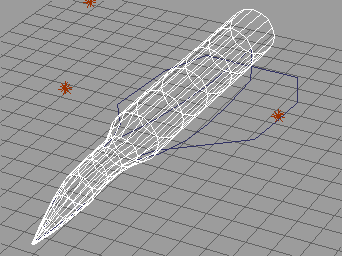
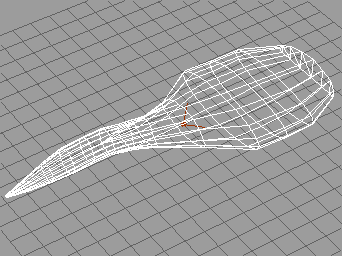
If you will not use SUKININ-KUN, make a cylinder at 13 latitude and 16 longitude for the Frame as shown in Fig.7-2. You can make fighter body object by transforming each section of the cylinder along the Frame. スキニン君を使わないときは、この例の場合、Fig.7-2のように垂直辺16、水平辺13で円柱プリミティブを作成し、その各断面を型枠にあわせて変形していくことでFig.7-1のBのようなオブジェクトを作成することができます。 Step 6 Arrange the body object to make it more suitable for a fighter body (Fig.8). Because its cross sections are mere ellipse. Use point editing tool and arrange each polygon one by one. このままでは胴体の断面がすべて楕円なので、ポイント編集で飛行機の胴体らしくなるように微調整をします。もうほんとにちまちまと1ポリゴンずつ形を整えます。この程度のポリゴン数なら、数値入力やグリッドをうまく使って手作業でも左右対称にできるでしょう。わかりにくいかもしれませんが、調整が終わったところがこの図 (Fig.8) です。
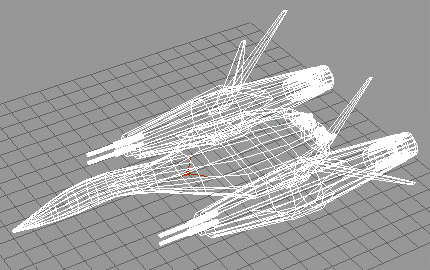
Step 7 Make engine objects (Fig.9). However, in this example, I will not explain how to make these objects in detail. Because making body object is main topic of this example. Basically, engine objects can be made from combination of transformed primitives such as cube or cylinder. When you have done, copy an engine object and mirror it to make other side of engine. 胴体の作成は終わったので、次に左右のエンジン部を作ります (Fig.9)。今回の例では中央胴体の作成がメインなので詳しく説明しませんが、基本的に円柱や立方体のプリミティブを変形させたものを組み合わせて作ります。片方ができたら、コピーをミラー反転して反対側のエンジンを作ります。
Step 8 Combine the body object and engine objects (Fig.10). Making a space fighter is completed! 胴体とエンジンを組み合わせて完成です (Fig.10)。胴体後端にちょっと細部を追加しています。
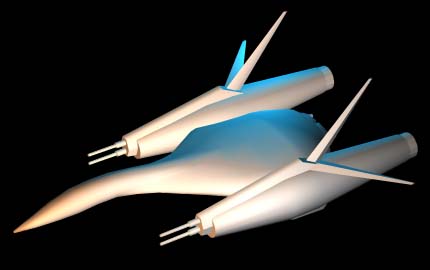
Fig.11 is a result of rendering under default lighting. The fighter is painted default white(R:128, G:128, B:128). The body object is set to smooth in shading window. The engine objects are set to auto-facet in shading window. デフォルトの光源でレンダリングしてみました(Fig.11)。マテリアルはプレーンで白色を塗っただけですが、エンジン部は自動ファセットで、胴体はスムースを指定してあります。 |